Thursday, February 27, 2014

Tiles and paint

Things are moving along. The vanity cupboard frames are in place, the walls are completely painted and the floor tiles have been set.
Also, today I picked up a replacement window that is double hung instead of the not-opening-much casement window that has been there. That will get installed tomorrow.
In other news, the fabricator who is installing the marble slab came by but unfortunately doesn't think he can do everything with one slab. That may mean we need to get a second (expensive) slab with probably a lot left over. I'm waiting to talk to him directly to hear more...

The paint colour: Miller 0607 Brush Blue

Here are some pictures of the development. The red paint by the rub is a liquid that sets to rubber and is impermeable.
The grey floor is cement that encompasses the wire for the floor heat.
Note also the vanity on the left shrouded under a protective dark grey sheet.


Here is the floor tile pattern:

Unfortunately it didn't get laid that way. Not sure if there is anything to be done about that :(

Another thing I didn't realise we were going to have to choose was grout colour. We chose colours to match the tiles, in shades of white and grey.

Friday, February 21, 2014

Lights!

One of the things we have recently had to do is decide where to put light fixtures and choose which light fixtures to use. The sloped walls lent themselves to having a light from the peak of the roof. There was also the question of whether there should be light in the shower.
We ultimately decided on the following:

  • Two pendants hanging from the peak of the roof. Since the walls met at an angle, this required a flat surface to mount the fixture canopies on. As a result, we flattened the ceiling in order to provide space for it. I was a bit worried that it would lose the tall effect but it really hasn't.
    This has actually been the hardest thing to select and for now we are going with the Possini Encircled Crystal Globe 12" Wide Halogen Multi Light Pendant.


  • A light above the shower. It may not be necessary after all to have a light here, but it will be nice to have a bright shower instead of having something too dim. The fixture and trim here needs to be rated for a wet location. With not much choice in this matter, we chose the Halo Recessed 170PS 6-Inch Trim Showerlight Albalite Lens with Reflector. Just today, I discovered some much more interesting looking flush mount fixtures like this one, so now I'm having second thoughts on this. The challenge is that there is already a recessed can installed above the now complete drywall...

The two pairs of lights at the vanity are on their own switch near the vanity.
  • Finally, a light above the little triangular storage space nook. This is the same as what we have in the kitchen, but we're just using one of them to provide a little illumination. This too is on its own switch. IKEA Grundtal Spotlight.

In the expanded wardrobe, we also need to choose some lights. One will be a sconce and the other will be a flush mount on the ceiling, perhaps matching. In wardrobes, they need to be CFL or LED bulbs to avoid heating the clothes too much and creating a fire risk.


Thursday, February 13, 2014

A bigger wardrobe

The shape of the bathroom is starting to become closer to real. Drywall has begun and you can start to see the inner frame of the room.


But the exciting news is that the wardrobe in the bedroom is expanding into the storage space (see more at the bottom of the last post). Today the work to break down the walls (including studs) began and it will be a pretty big wardrobe (with a low sloping ceiling). But this will allow for a much more efficient use of space. This space won't be finished by the contractor, that's a project for us to do, which I'm looking forward to. That will include painting, carpeting, millwork, closet rods and shelving.
The existing wardrobe on the left, with the door to the bedroom and the expansion into the storage space. There will be a wall constructed on this side with an access panel to the plumbing.
The view from the existing wardrobe area into the expanded area.


Tuesday, February 11, 2014

Insulation and storage space

Yesterday, the insulation has begun to be put in place. The room used to have R-11 behind the drywall but this is being upgraded to R-13, which is the thickest it can be without creating thicker walls. It looks like a bit like a down jacket now and some work still remains to finish insulating.


The tub also has insulation around it, both to keep the water warm and to make it more quiet when filling.

Soon, the drywall will be put up and the room will begin to take final shape. Before that, I have begun to explore how to make use of the space that is now behind the vanity area. It's sloping down low but it makes a good storage space and it would be a shame to lose. It happens to be next to the wardrobe in the bedroom so I'd like to expand the wardrobe into it. There are some studs holding up a header (in pink below), so I'm not sure what's possible, but here's a plan of the current view, followed by what will hopefully take its place. Some of the storage space would still remain which would also give future access to the plumbing directly.

Current:


Proposed:


Sunday, February 9, 2014

Cabinets and wardrobes

We didn't use to store much of anything in the empty room where the bathroom is going but we certainly have plenty of things elsewhere and we made sure to plan for enough storage space upstairs. My father also suggested adding wardrobes in the corridor while at it since we are a bit tight on wardrobe space as it is.
One of the early decisions we came to was that in addition to having wardrobes in the corridor, we would also have a wide vanity with drawers and make use of the area under the roof on the other side of the room by providing storage there. The challenge with that space is that it is a slanting spot that limits what you can put there.
We spent a while looking at options for vanities and trying to find matching cupboards for the other side of the room. You can buy a vanity for $2000+ from Keller so that is a reference point. We also looked at the Chinese cabinet makers in SoDo (who also install granite). They build the cabinets from plywood and they are modular, coming in specific sizes, though I'm sure you could request a special size if you wanted. That list of specific sizes reminded me of Ikea and I started looking into their furniture. I have had good experience with their static furniture that is not being moved or jostled (like a dining table, etc). In fact, all the cabinetry in the kitchen is from Ikea and it has held up well. Moreover the drawer and door action on the plywood furniture was just not as good as my kitchen cupboards. I looked at Ikea's bathroom furniture but it is specifically designed for their very shallow sinks. Then I realised that Akurum kitchen cabinetry would work just as well. I talked to the contractor about it and he said that noone else had thought of doing that in the projects that he had worked on, which surprised me. The one difference between kitchen and bathroom cabinetry is that kitchen counters are apparently a small amount deeper than bathroom cabinets. That wasn't a big problem for us.
We knew we wanted a 60" vanity with a single sink so we eventually decided on a central 24" unit to hold the sink, flanked by two 18" units with four drawers each. While in Ikea, we saw a setup where the center sink unit, instead of having two doors as is often the case, had a single panel that slid out on a deep drawer so you can actually get to all the things under the sink much more easily. That was an easy decision to incorporate.
For the faces, we chose Perfekt Abstrakt Grey 

On the other side of the room, I spent a lot of time looking at the many options that they had and planning it out in Sketchup. I eventually decided on two 24" floor units with drawers in the middle and a 15" floor unit perched above and to the side of them. That left a small spot to the left at about 12" wide but quite a bit lower due to the sloped ceiling.. The challenge was that Ikea doesn't make short cabinets at that width (and why should they? it would be quite an odd size). I did find however that they do have a 24" tall unit that is designed to go over a fridge. The unit is 30" wide but I cut it down to 12" and assembled it almost like normal.
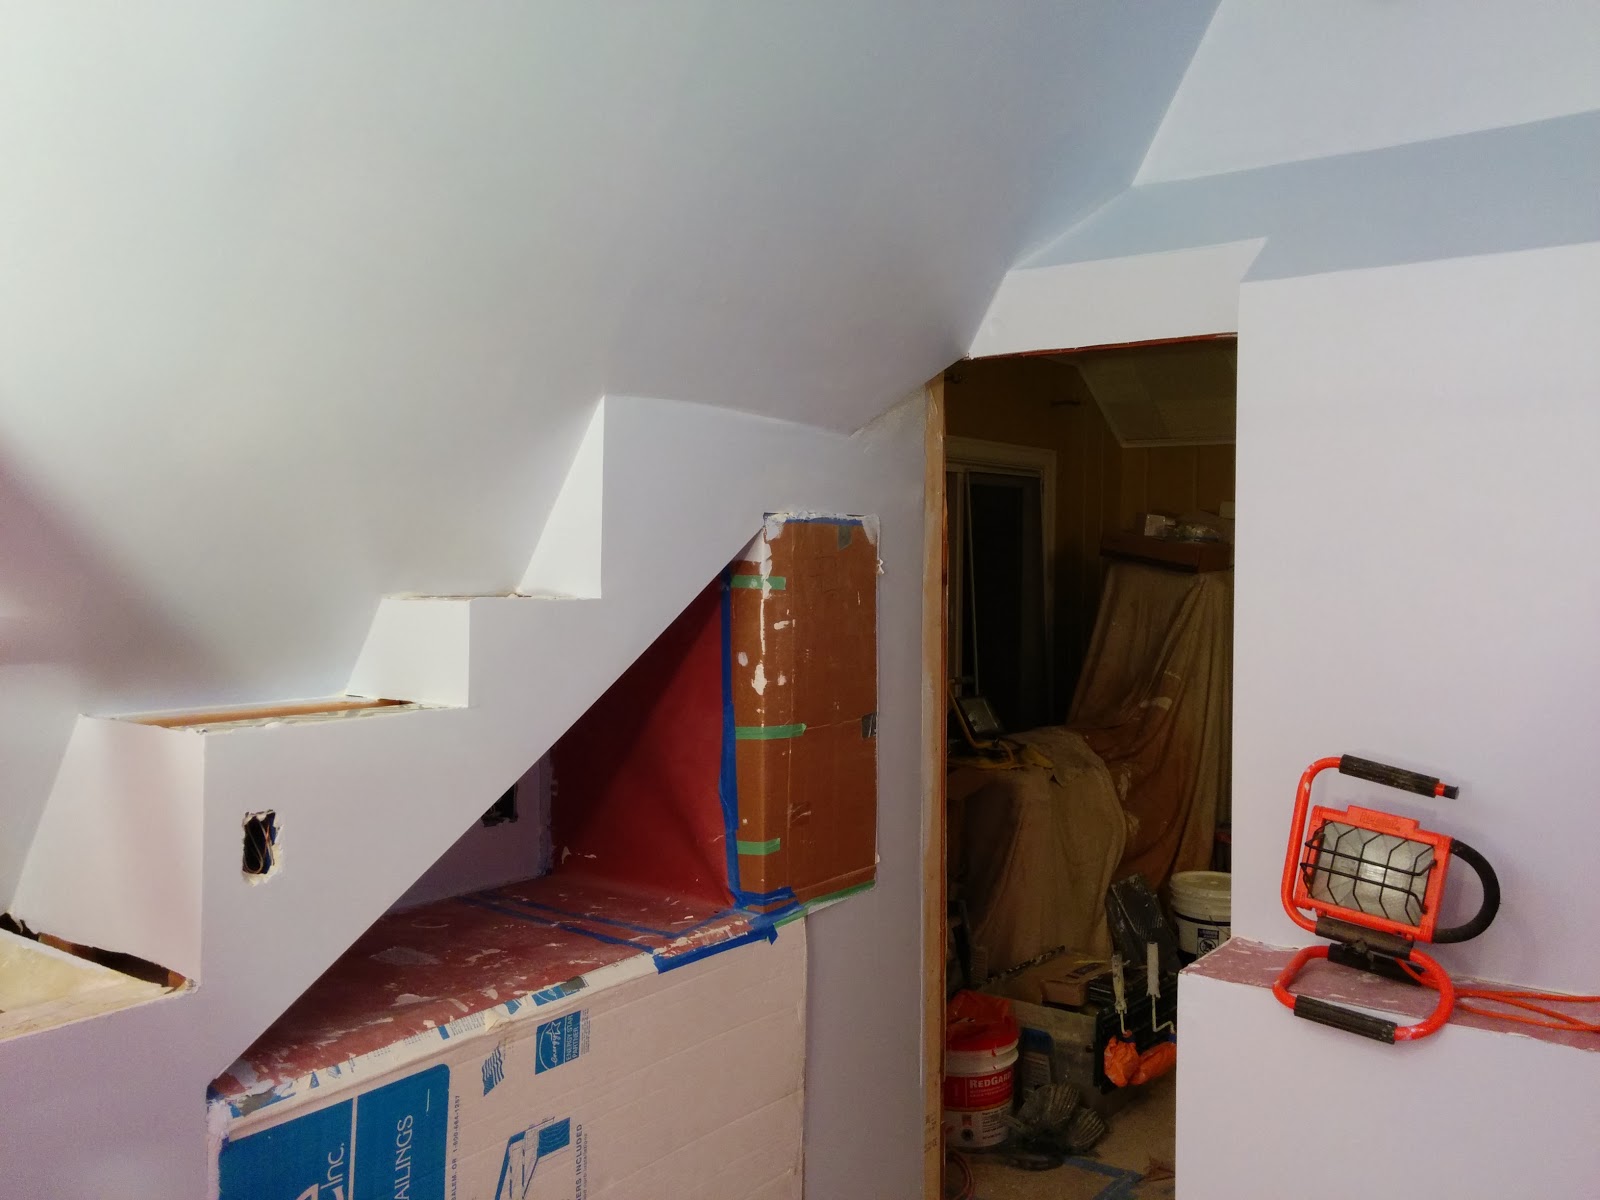
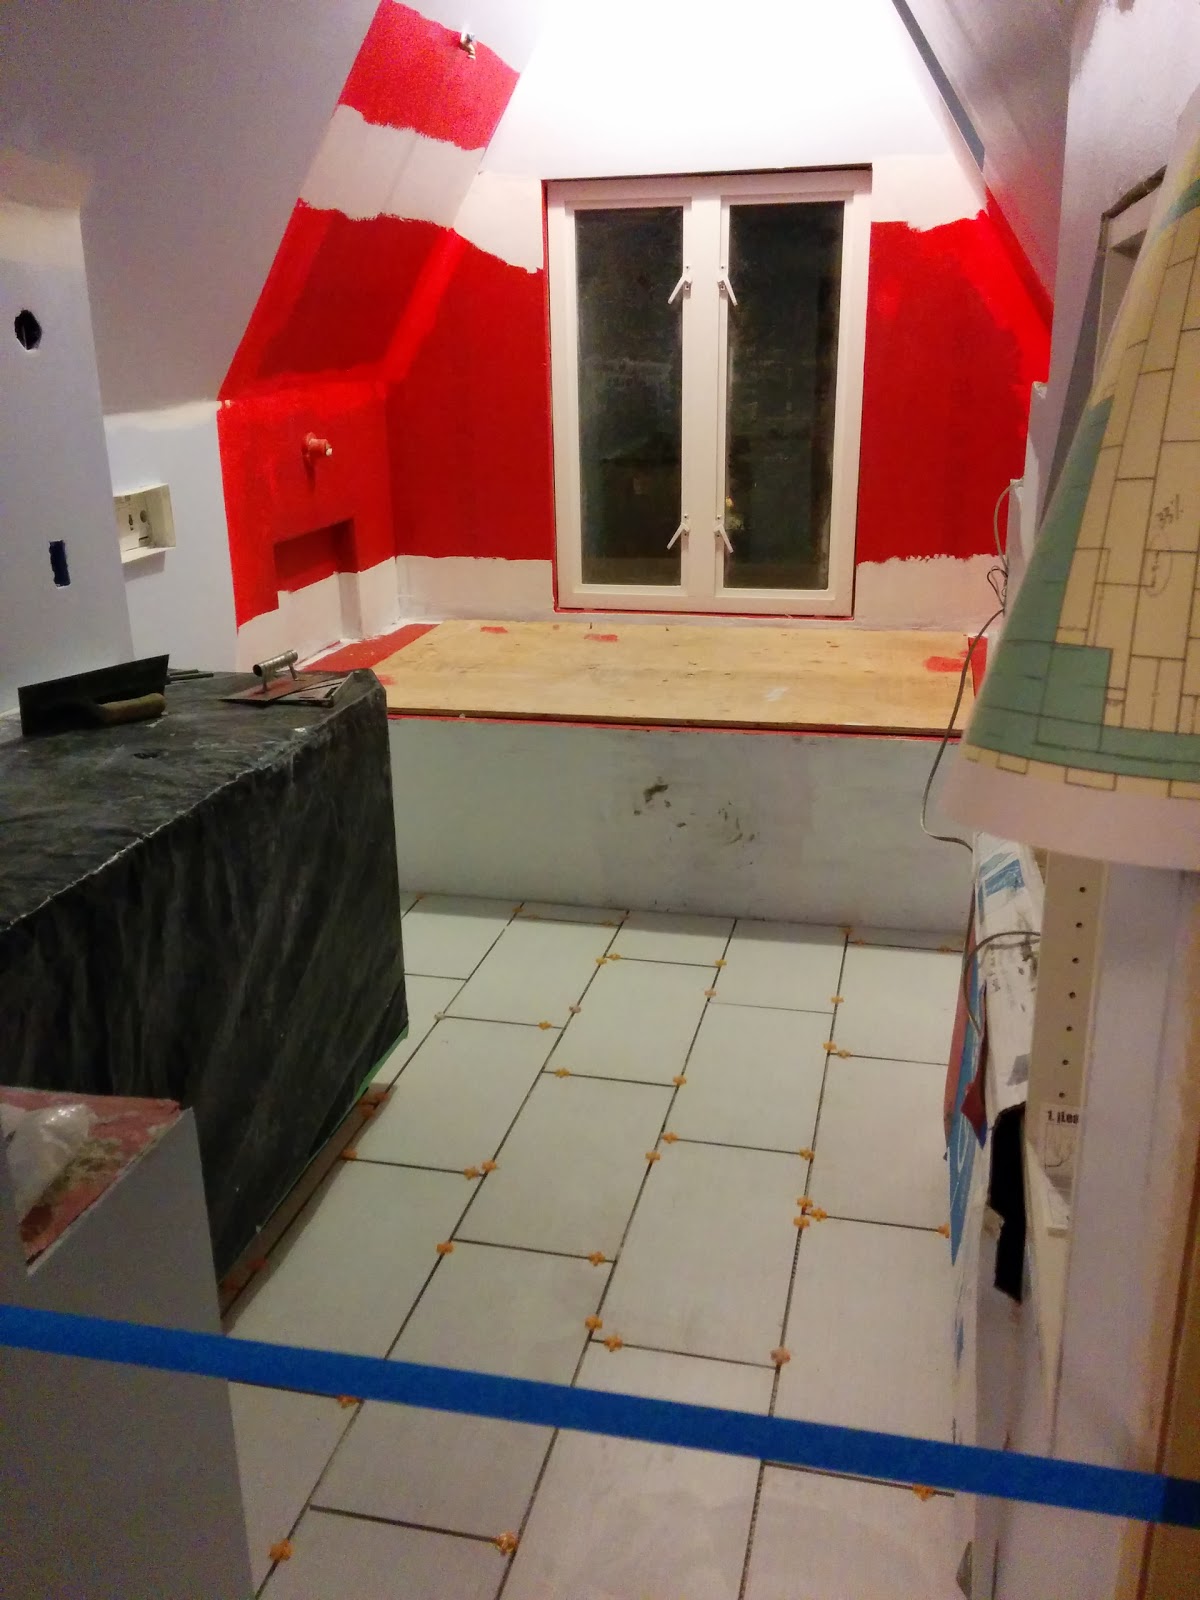
On the surface of the central units there will be the Blue Rainbow marble, just like on the countertop and the tub deck. The white areas are drywall.

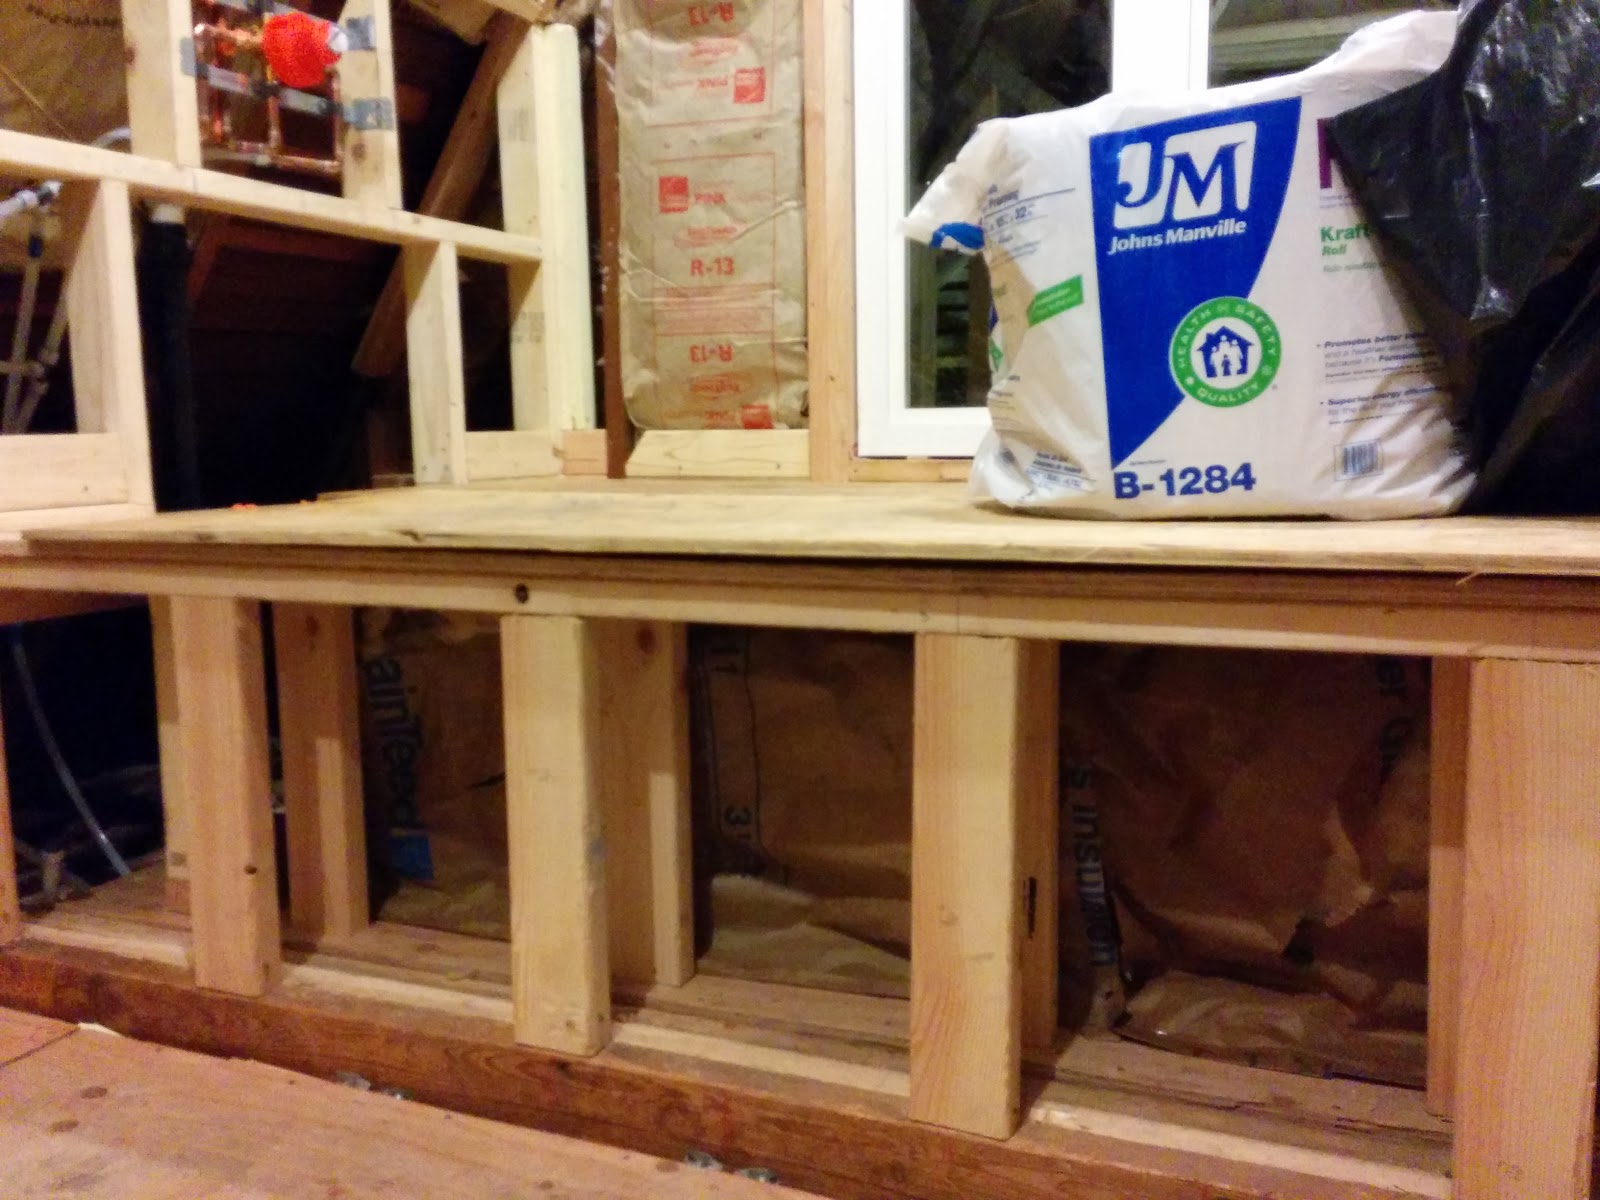
Here's a photo of some of the finished product, placed for fit:
Over-refrigerator cupboard on the floor on the left and floor cupboard sitting on another floor cupboard on the far right.

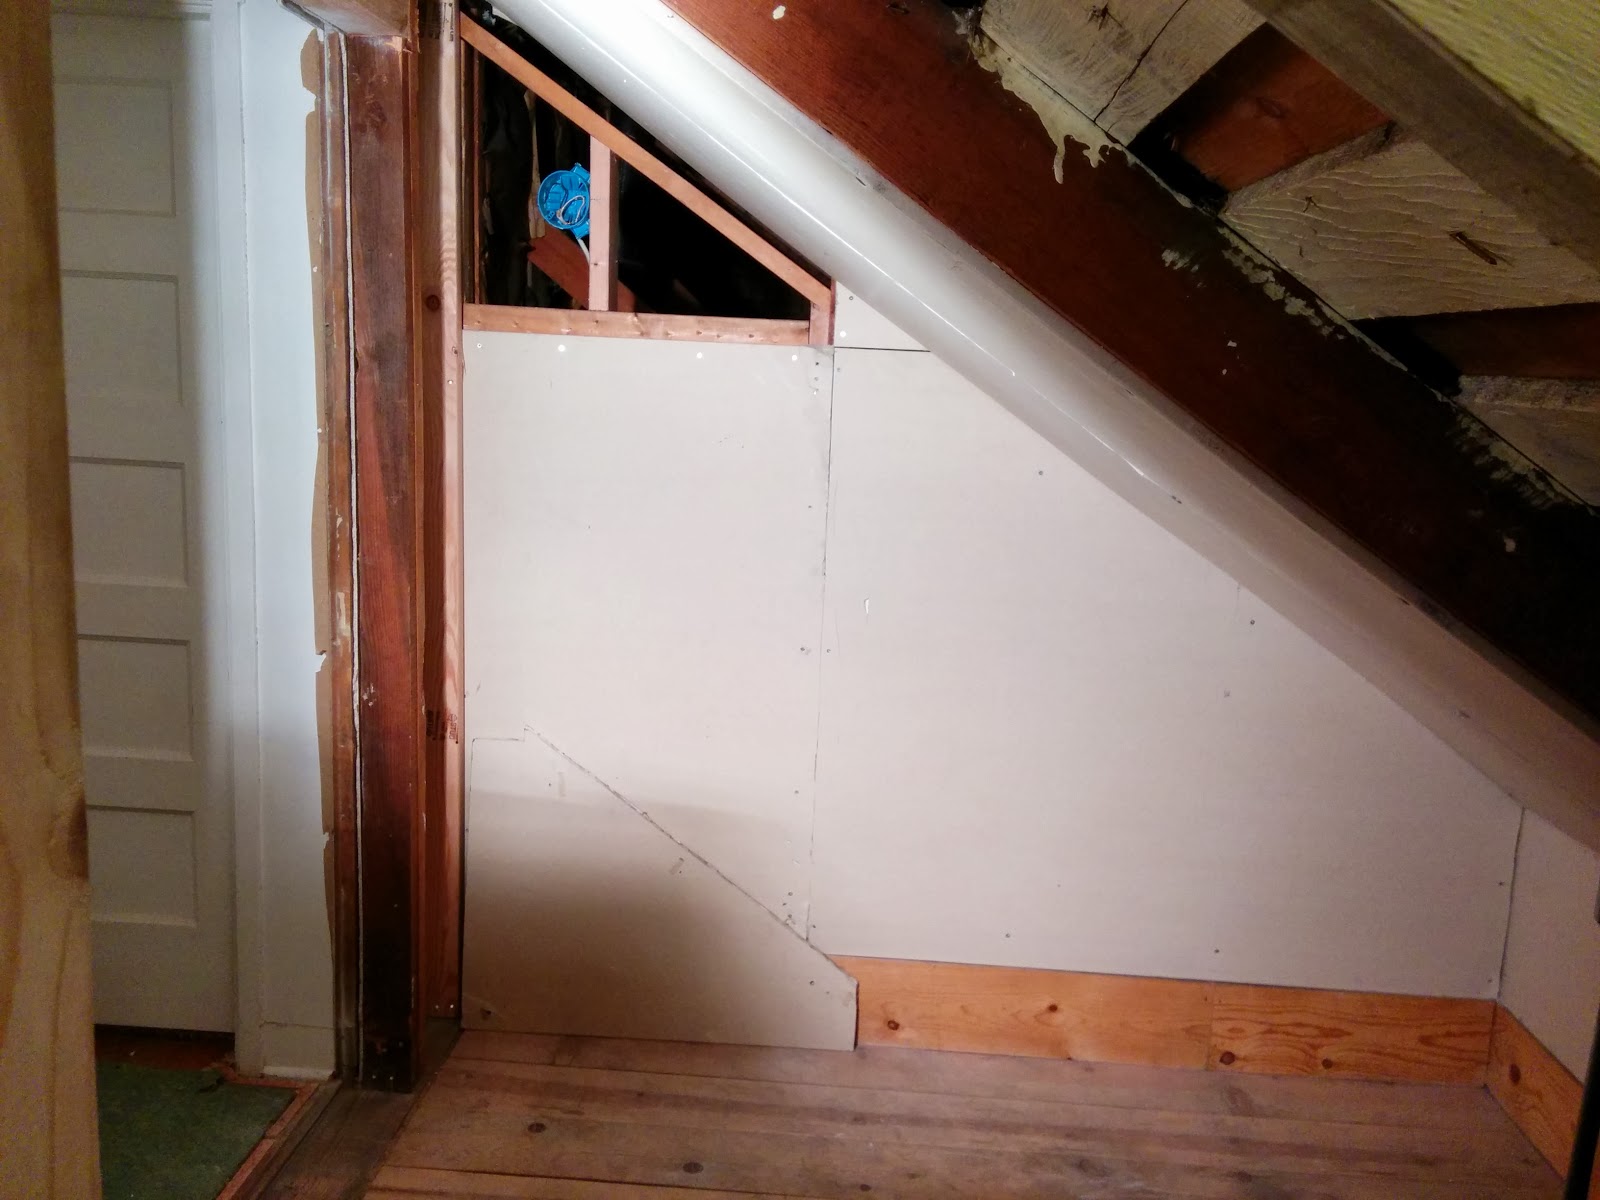
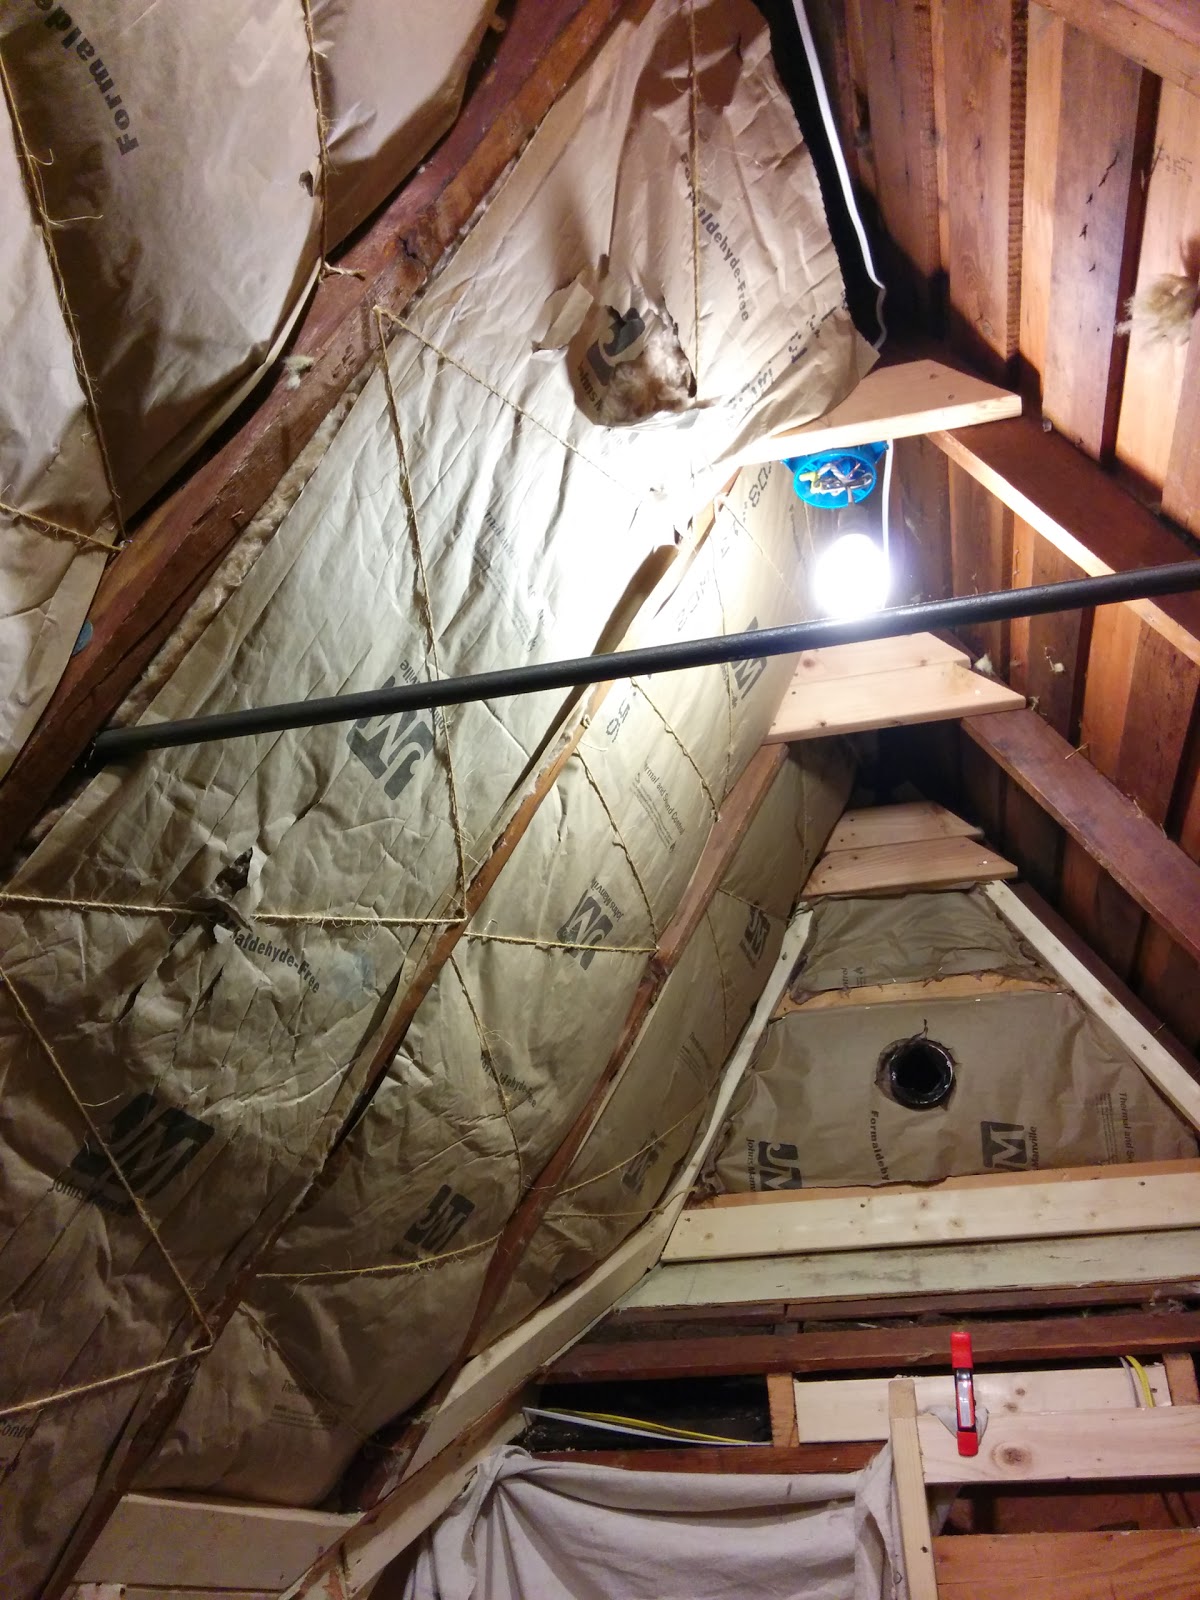
One of my first ideas was how to make use of the slanting roof. The default that the contractor proposed was to turn that face into a wall, just like on the other side where the vanity will go. I didn't want to waste that space and always thought it would be nice to have a "staircase" of shelves that you can put things on. In the picture above, you can see  how the shelves have taken form from the diagram below.
Note that the edges of the shelf surfaces are constrained by the sloping roof so they are widening as they descend as well as sloping on edge.

In the corridor, we went with Ikea again, this time using Pax wardrobes. There was about 100" available but it turned out that there were a number of studs in the way so using anything wider than 20" wardrobes would make things more difficult. We eventually decided to use four 20" units.
Assembling these had the biggest challenge. Not only were they too tall for the space, but the rafters were immediately behind. Therefore, I had to cut them shorter and put a slant on the top. For the top, I used the original top for the front part, and a shelf for a shallow Pax unit for the slanting back piece. After I had built two of them, the contractor suggested caulking the gap to prevent dust from coming in.
Here are a few pictures of the finished product:
In the front, this unit is now 72.5" high instead of 79" and the back is now 65.25" high.

You can see the white caulk in the picture above.

One of the big challenges was figuring out how to cut the large angles necessary. While the rearmost angle is 35 degrees, the overlapping angles in the middle are 55 degrees. By attaching a sacrificial fence and holding the pieces vertically through the table saw, I was able to cut the 55 degree angle that was needed here.


A cutaway of the top construction. The first unit took over four hours to figure out the angles and methods to cut the various. I wrote down instructions and measurements for myself and the next three went by much faster.


Friday, February 7, 2014

It's electric

Today concluded getting the room mostly electrified. All the outlets and switch boxes and thermostat box have been placed and wires go to them. What is really cool is that there is now a (temporary) light switch right at the entrance that turns on three temporary lights in the ceiling along with the vent fan. The vent fan will be on its own switch later. I don't like listening to fans or vacuum cleaners so I tend never to turn on a bathroom fan. But this one sounds relatively quiet.

All of the boxes are live so no touching the wires...!
The tub is now set on foam and is full of water to weigh down the foam so the tub doesn't rise out of the deck.

Here are the lights that have been installed temporarily. The one at the far end is over the shower so it is going to have to be waterproof, or at least suitable for damp installations. In order to put lights in the apex of the roof, we had to flatten the ceiling to create a little area for the lights to sit on. We're currently looking for lights. The apex is about 11' off the floor so the pendants will have to be at least 3-4' long.

In other news, the wooden beam that was acting as a collar tie is gone and replaced by a custom 3/4" hot rolled steel rod. You can see it in the picture above as the black horizontal bar near the bottom. The good part is that we can do pull ups on it too! Collar ties are necessary to hold a roof in the intended orientation so that it doesn't sag. It seems that nowadays they are not necessary if there are rafter ties/ceiling joists that go parallel to the rafters (which we don't have) and the rafters themselves are more substantial than 2x4s (which is what we have).
Apparently, it's also used in wrestling: http://en.wikipedia.org/wiki/Collar_tie


Plumbing rough in

After an uncomfortable long hiatus, work has begun again. Last week was reserved for the plumber to come and do work but getting him to show up was a challenge to say the least. He had double/triple booked himself and several times said he was coming later that day only to never show up. He finally did clear his plate and showed up on Sunday (two days after he was supposed to be completely done with the rough in). Getting waste lines run through the bathroom and down to the main sewer line was an incredible challenge. The waste lines from the tub, toilet and sink within the bathroom take a convoluted bath to get near the furnace stack and then continue in a circuitous path from there. First the line (3" black ABS) jogs under the floor in the bedroom wardrobe and then bends around to go down into the small wardrobe in the living room. It goes through that wardrobe taking a few turns along the way and down into the basement at which point it goes *through* a furnace duct and carries on into the garage where it goes across the garage ceiling to finally tee into the existing sewer line. It's really quite a journey.
It has been quite the challenge for the plumber and he said as much. At one point during the day when he was installing the waste line, he sent me a brief note saying, we have a problem in the garage, don't use the bathroom. I later found out that while cutting the existing waste line, it had cracked along the length so he had to rush out and get some materials to repair that at Home Depot since the normal plumbing supply stores were closed at that point.
In easier news, the in-wall toilet carrier and the water lines also got installed. The water lines are made of PEX by Uponor which is a remarkable material. The plumber showed me a neat trick where I bent a piece of PEX until it was kinked and then he took a MAP torch and heated up the bend which then returned to a perfect tube again. Apparently copper is not used at all anymore. It loses heat easily and the PEX is flexible almost like a hose.

At this point, not a single room in the house is unaffected by this construction, all for just one room! The bedroom wardrobe has been emptied to provide access to its floor, the guest bedroom is a storage room for everything that has been moved out of the way from various places, the office is a storage room for cabinetry for which there is no room elsewhere, the dining room and living room are storage and assembly places for the cabinetry, the kitchen is a path to the basement and garage, the existing bathroom has no floor mat and the garage is the workshop for the contractor and plumber. Almost all of the rooms have cardboard on the floors to create a path to walk on to avoid damaging the wood floors.

The P-trap for the tub on the left and the connection to the overflow valve on the right.

The waste line coming out of the ceiling of the garage

Crossing the garage on the right to tee into the existing vertical waste line


The waste line from the sink coming from the bottom left, joining the waste line from the toilet. Further above and to the right is the waste line from the tub. They join at the left and go into the wardrobe in the bedroom, under the floor. The vent rises out of the junction.

The tub waste line, now with a vent on it.

The toilet carrier and the valve installed. The valve has two positions e.g. for a shower and a tub, but both positions will go to the shower since that was a simple solution to the question of how to control the water. There will be separate control for the deck mounted tub filler and deck mounted hand held shower.

A closer look at the shower valve. The white tubes on the bottom left are PEX.

The shower head.

The sink water and waste lines (white PEX water line and black ABS waste line)

A couple of interesting pictures of the room taken with the Photosphere and Panorama modes on the Android phone.