Sunday, January 26, 2014

Framing and spouts

Over the last few days, the wall and tub framing has been completed and the tub is set in place. The wall around the tub is also in place and ready to put board and tile on. The room is looking more and more like a bathroom. If you squint.

Here's the tub in place, along with a small grotto we decided to add to the end of it to hold soap, shampoo etc. Just to the left of the tub is where the toilet will go and the vanity next to that, close to the door.

Above the tub, that's a rough Sketchup model of the tub that I threw together to illustrate the grotto and the walls around the tub, along with where the valve will go.

A thought occured to me after the tub was framed: should the tub not be insulated? It seemed like an important thing but neither the contractor nor the plumber thought it too important, partly because the tub is made of fibreglass. I opted to insulate anyway since there's no harm to do so and the tub is right next to an exterior wall. I'd rather not heat the air around the tub with the hot water. I understand that it also reduces any noise that may be caused by filling the tub. In talking to the plumber, we decided to bring an extra water line from the basement up here to accommodate a future hot water circulation system if it becomes necessary. It's much easier to bring the water pipe up from the basement now while everything is exposed and demolished instead of having to do it later. Future proofing.

One thing we realised while we were looking at all this was that the wall mounted tub spout would not reach the tub! The spout is 8" and the distance from the wall to the very edge of the tub is 13" or so. I wish someone had realised this long ago before we had ordered everything, but we rushed to find a solution. Fairly quickly, we decided that the spout would have to be deck mounted to reach, as a long wall mounted spout would look more like an elephant snout. There's a fair amount of the tub exposed too, compared to our other bathroom and pictures of other fillers, so it would still have to be fairly long to fit on the deck and not on the tub edge.
This presented new problems as most deck mounted tub fillers aren't made to also be used with a fixed showerhead, since most people seem to have separate tubs and showers. For a while, we thought about combining a deck mounted tub valve with the shower head and diverting from the deck to the showerhead. This required using a diverter on the deck mounted valve to switch between the filler and the showerhead and discarding the handheld showerhead that came with it. The plumber pointed out that another solution would be to bring two water lines instead and have two independent systems: a valve on the wall that controls the showerhead and a deck mount system that diverts between the deck mount tub filler and the deck mount handheld shower. That's what we finally settled on:
I never thought I would become this familiar with plumbing fixtures.

At the same time, the wall in the corridor where the cupboards will go was also cut out to reveal room for four 20" cupboards. The challenge here is that they are not very tall because there's a header holding up the roof so the cupboard we buy will need to be modified to fit.

Finally, the door to the bathroom has been made significantly taller and wider. It actually feels like a real doorway now. Before and after:


To close off, here's a view of the area above the door, behind you as you walk in. It's where the fan will go but also is a bit recessed and follows the roof line. It doesn't serve any purpose but makes the room feel much bigger so we decided to keep it that way.

Tuesday, January 21, 2014

Nothing

Nothing happened today. Neither the contractor nor his helper came today which was a bit of a surprise to me. I had assumed that they would be here everyday (except for a period starting next week when the plumber will be doing the rough-in).
It highlights a key point which is to establish the style of working up front, something I admittedly haven't done. I much prefer overcommunicating in every field, so I've tried to convey that to him in the hopes that he will be more proactive from now on about letting me know stuff. Another surprise from a few days ago was to come home to the damaged dining room ceiling, with no explanation by email/SMS or a note. However, when I asked him about it, he readily explained that this happened during framing and that he would fix it during the sheetrock phase.
Hopefully, in the future communication will be clearer, but it's certainly possible that it's just not his style which implies that I have to work around it somehow. At the end of the day, he and his crew will be here for eight weeks so it's in our best interest to cultivate a working relationship that is conducive to our end goal of having a great bathroom with high quality workmanship. While it may be satisfying in the short term to vent my frustration to him, it probably won't ensure better work :)

The dining room ceiling. Apparently, the hole wasn't very big but in order to repair plaster you have to remove the surrounding plaster first.

In place of a picture of the bathroom, here is one of the sunset looking out the kitchen window.

Monday, January 20, 2014

A post about posts

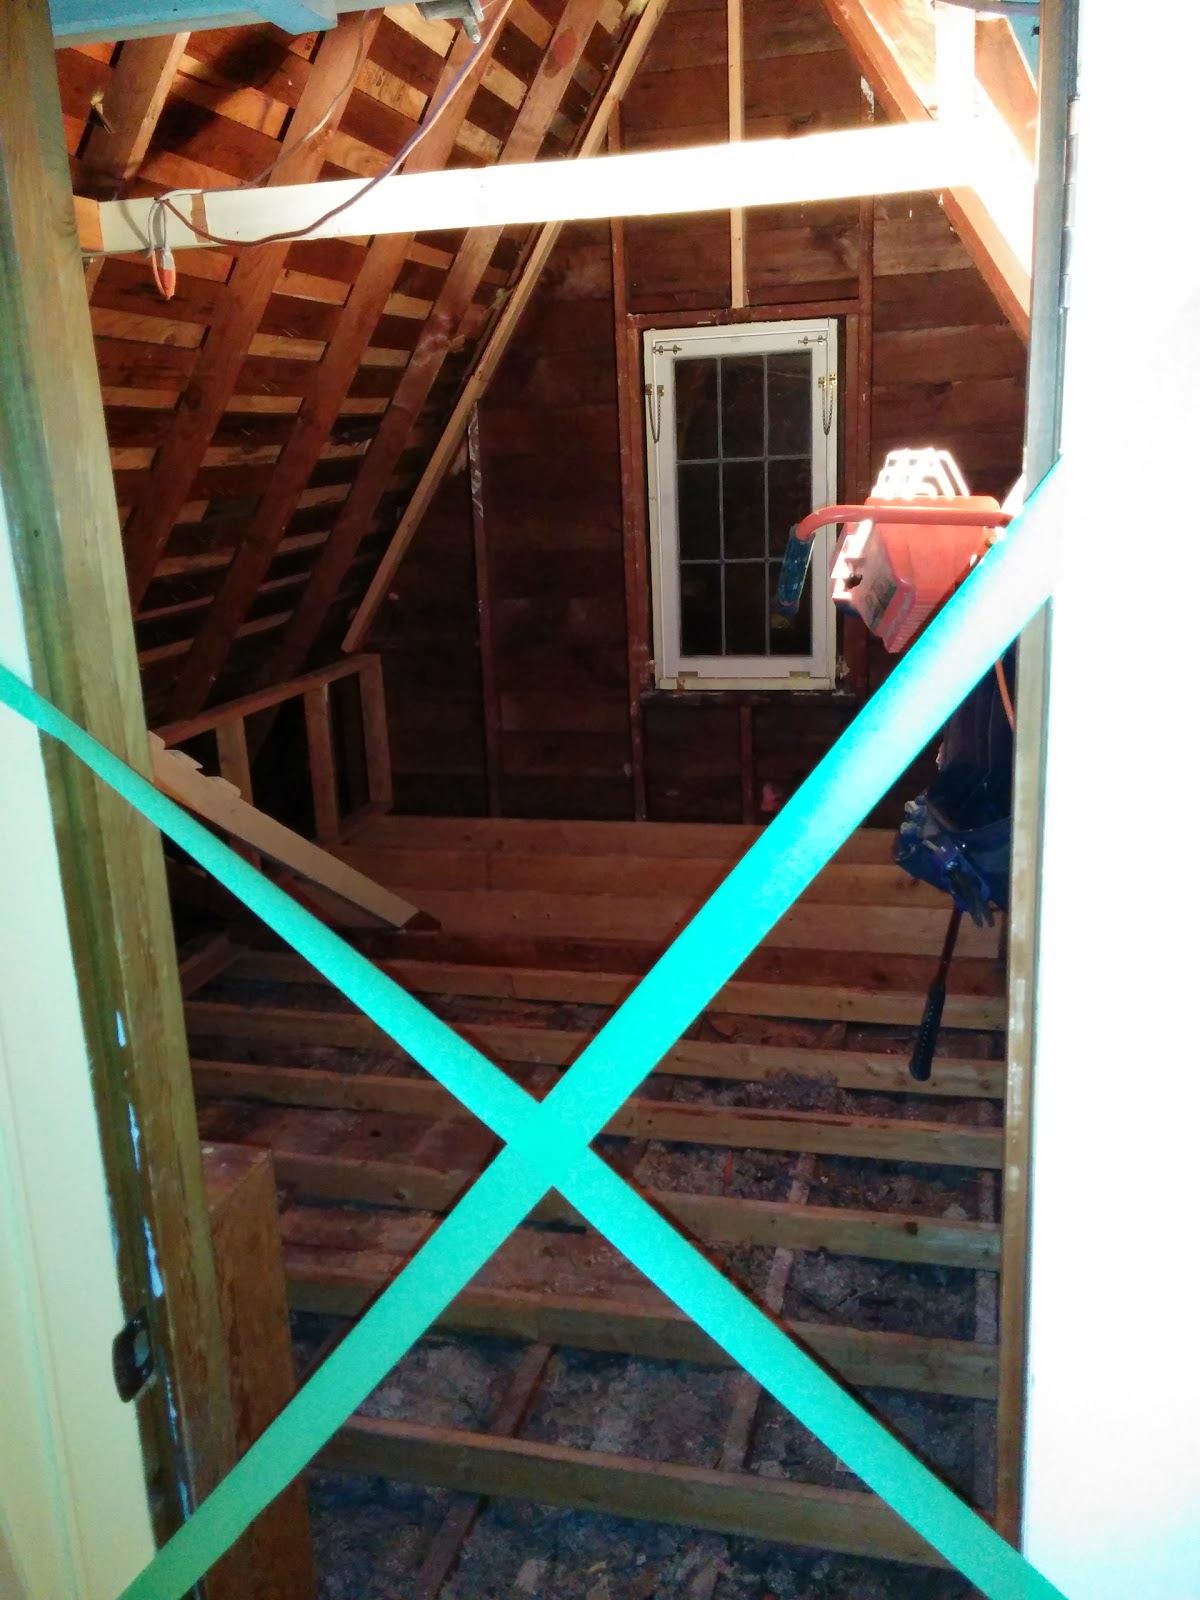
The most exciting thing that happened today was that the roof support was cut back and replaced with posts which further opened up the room. In fact, while I was talking to the contractor today, he pointed out that I was standing where the toilet would go. That was somewhere where you previously could not really have stood because of the roof and it felt very natural to be there. Also, the subfloor is almost finished and some framing has begun for the walls.
The door to the room is gone too, presumably to make it possible to enlarge the door frame before the door arrives.


In this picture you can see the roof support cut away and replaced with the posts. One on the bottom left of the picture and one behind the fan.
The new framing is also visible under the right roof support. Some of that framing is attached to the other (brown) roof using (white painted) wood from the roof support that was cut away.


Saturday, January 18, 2014

Floored

Yesterday, the new floor support was added. The floor joists are mounted to the same structure around the sides of the room as the ceiling joists but don't touch the ceiling joists at all. So there should be no load on the ceiling below.

Somehow though, we came home to a piece of the plaster in the dining room below missing... It will be repaired during the sheetrock phase later on.


Today, we went to look for a replacement window and the one we found that seems most suitable given the limited selection of window styles is a double hung vinyl Milgard one. That should be durable in the wet area too.

Here are some pictures from the daytime. It's nice to see so much light coming in even with no lights on.
The tripled joist near the window is designed to support the weight of the tub and we hope that the face of it can be the front of the tub apron. That would put the bottom tub at the same height as the floor which means no step would be required.


Friday, January 17, 2014

Let there be (sky)light

I came home to a pleasant sight today, that of a newly installed skylight. I've never had a skylight before except when I was very small, so I didn't really know what to expect. It looks really great, at least by night. It's 2'x4' and faces due south, so I'm looking forward to seeing it in the morning.

The floor structure was also upgraded to support the added weight of a tub full of water and a tile floor. The new floor will not be resting on the ceiling below at all, but rather on the walls and foundation.

The tub also arrived this morning and has made it upstairs as far as the living room:

Unfortunately, the window is not going well. The current window is designed to open just 30-45 degrees which makes me wonder why anyone would even bother to manufacture that. It's so useless, it's like a trial that ends too soon when you try to swing open the window panes. Not only that, the pane slides on a track so that when it opens the frame obscures the window opening and brings the panes even closer together. For me, a window is something that is like a miniature glass door with hinges on the frame that opens as far as you push it. Apparently that's not very common at all here, which boggles my mind. I didn't even think to ask, does the window open all the way because I assumed that all windows do. I've never seen anything like this before... This weekend we are (literally) going window shopping to find a more suitable one. The two top contenders are an extremely expensive wooden window which will require repainting every couple of years and a vinyl single or double casement window.

Here are some pictures from this evening, including the new skylight:

 It's a bit hard to see but the header above the doorway has also been removed which has really opened up the space above a lot.


Wednesday, January 15, 2014

A new window

The new window was installed today. It's nicer and larger than the old one. There's one concern with it though: it doesn't open very much. About 30-45 degrees -- I was expecting it to open 90 degrees or more... hopefully there's an easy solution to this.

Here are some pictures from today, including some additional historic finds from under the floorboards:


These coins are sales tax tokens from Utah, Louisiana and Alabama.


Who needs a floor anyway?

The floor in the bathroom has been removed so all that is left is the joists. The contractor will be adding more support for the bathroom floor so that it sits independently of the dining room ceiling. The loft in the bathroom was also removed except for the support beam which is holding the peak of the roof together. It will eventually be replaced by a metal beam. Some basement framing also was completed to provide better support for the weight of the bathroom itself since it won't be resting on the foundation but rather on a joist.

I had to hop in there both to take the pictures and also to mark where the skylight will go. The bottom will be approximately just above head height a few rafter bays in from the window.

Some pictures from today, including a sign of the times -- a rent receipt from 1978 that was lying under the floor. $93 for rent, not bad.


Tuesday, January 14, 2014

Write everything down

One of the things I have been doing since the beginning of this project is writing down everything I have learned and keeping track of all the decisions, timelines, costs, etc. I've been trying to do this with everything in general because inevitably, about 20% of it comes in useful later in one way or another.
I've been using Google Drive to track this and created a folder for this purpose where I have put notes, spreadsheets, diagrams, pdfs, etc. Using SkyDrive, DropBox, etc would also work but I think Google Drive has a few advantages such as simultaneous editing by multiple people, revision history and better mobile app support.

Some of the things I've been writing down include:
  • A spreadsheet of bathroom fixtures with links to their cut sheets and installation guides.
  • Sketchup images of cabinetry configurations and the new window.
  • Agendas for meetings, along with follow up notes.
  • The contract.
  • A timeline of things we need to do.
  • A short day to day bullet point log of what has happened each day. I just started this yesterday and it might be duplicative of the blog, but we'll see.
Here are the main reasons for me to write things down. Most of these apply to other projects at home and at work too:
  • Interest: I take great curiosity in knowing how things work and this really tracks the details of the project, both at the time of it happening and for reminiscing later.
  • Record keeping: Should I need to refer back to something in the future, I know where to find it and what decision/thought we had at the time. Otherwise, I would be searching through my email, only have it on a piece of paper (who knows where), or not have it at all.
  • Future projects: If another project of similar character comes along in the future then I'll have this as a template that I can look through to remember what worked well, both in terms of how to do it as well as what things were useful to write down and what were not.
  • Sharing: This is probably one of the most immediately useful things. Instead of emailing attachments to +Liana, the contractor, the plumber and Keller and trying to make sure everyone has the most up to date version, it's far easier to put a document in the folder which I've shared with all of them and let them just look at it there. Whenever someone looks at it, it's the most up to date version too. I've also made it so that they can edit which means that for example if I make a list of items, someone else can change it, comment on it or add to it.

Monday, January 13, 2014

Work has begun

Today the work began. The house looks a bit different now with paper and cardboard taped to the floor where the workers are going to be walking and today's biggest piece of work was removing all of the old drywall and insulation in the bathroom. It appears that the insulation will be reused since it is in a pile in the corner, but new drywall is part of the construction. The garage is also full of things, including the new window and the skylight. It will be exciting to see this get installed.

Here are some pictures of the first day of progress:


Preparing for work

Today the work begins. I'm excited for that to happen after all these months (years) of planning and stress. I feel like we're at least past the halfway mark on planning and the majority of the big items have been decided on. At the same time, I'm anxious about what the house will be like and how it's going to be to have construction in the house for two months.

As part of the preparation, we had to clear a number of areas to make room for the workers. I emptied the room that the bathroom is going in but also emptied half the living room and dining room, both to provide ample passage as well as to allow access to the wardrobe in the living room that the water, sewer and electrical are going to go through. There are also a couple of areas in the basement that need to be cleared which was also a great motivator to finally organise a bit and clean out stuff that we don't need.

Here's how the room looks now:


Sunday, January 12, 2014

Surfaces

As part of planning and designing the bathroom, one of the major things we've had to consider is the colours and surface types. There are so many and we seem to keep discovering more. One of the things I've realised is that since everything has to tie together, it becomes a lot easier to start with one thing that limits your other choices. For example, if you are dead set on a particular floor tile or a particular countertop, then that makes choosing the other parts easier because they have to match. Things that might drive that would include design choice, cost, etc.
We started by spending about 2 hours at Art Tile choosing a set of colours that went well together and thought we had that finished. That was relatively easy other than the time spent, because +Liana is the design expert. Then, later we started looking into countertops. Granite was suggested so we duly went to the various granite places in Seattle. Most of them are in SoDo which is quite handy. It turned out that this part was rather an exercise in frustration. The way this system works is that there are those places that sell the slabs and those that fabricate them. That is to say that the fabricators are the ones that pick up the slab (which weighs a tremendous amount), bring them on site, cut them and install them. Each fabricator gets its own price from the seller of the slab and each one charges some different markup. As a result, many places that have slabs won't even tell you what the price of a slab is. Some will indicate price categories so you know that some are more expensive than others but there is no point of reference. A couple of places that we went to that do this include: Pental and MSI. Just avoid them. Not only are they uninformative about price but they have expensive looking showrooms that are paid for by their high prices (I did eventually find out their prices are indeed higher). We did not end up visiting Daltile which would have been the other place to see. The whole business is rather fishy with a lot of people taking a cut before it arrives in your house.
One place stood out from the rest: Meta Marble and Granite. The people there were tremendously helpful and incredibly, were able to provide approximate prices. They still require a fabricator but really made us feel welcome and we left informed with samples that they cut especially for us.
As far as fabricators go, many are also located in SoDo. We ended up at San Yuan, which was one that the contractor recommended and they were able to give us a price a few days later. They were very helpful too. The price they got for the slab was close to the Meta estimate and then on top of that, they add fabrication cost. This is proportional to the amount of exposed stone there is since they have to machine it to look nice instead of a rough cut. So a vanity countertop with only two visible sides is cheaper to fabricate than one with three visible sides.

One of the things we learned along the way was that the plumber had strongly recommended against a drop in tub because of the completely enclosed surround. This is because with a drop in tub, there's nowhere for the water between the tub edge and the walls to go. For a free standing tub, a drop in tub is fine, since it can drip onto the floor. He recommended an undermount tub instead so that the water can end up in the tub.
After we had visited San Yuan though, I got a query from them pointing out that the tub we had chosen was not suitable for undermount, but only drop in. I thought we were back to square one and rather frustrated that noone had mentioned this along the way, but fortunately the contractor suggested that he could make almost any tub work as an undermount by building a flange for it on the frame.

More about the various surfaces:

  • Tub deck and vanity countertop: With decks and countertops, there is tremendous variety: Granite, quartz, marble, limestone, travertine, onyx, and probably more. It turns out that granite and quartzite are more or less the simplest to work with. Quartz requires more precise and expensive fabrication and many places won't fabricate marble because it's more fragile. Also, marble is more easily scratched which is not really a concern for bathrooms but is for kitchen counters. However, most of our contenders were marble (which incidentally was generally more affordable) because we didn't want strong colours or a lot of mottling. We also spent a lot of time thinking about whether we should use large tiles for the deck and the countertop instead, but ultimately decided on Blue Rainbow quartzite:
  • Floor: There is some variety here too. Tiles, hardwood floor, others... We went with a 12"x24" tile which has some texture so you're less likely to slip on it.
  • Tub apron: We chose a matte glass 4"x12" tile. It turns out that glass is rather expensive at approximately $20/sqft. To also have done a tub surround in glass would have been thousands.
  • Vanity backsplash and bottom of tub surround: This can be more granite/marble but we found a nice pattern tile with small 5/8"x4" pieces arranged in 4"x12" group that latch together.
  • Tub surround: Classic white with a bit of gloss so it's easier to clean. This will go all the way to the showerhead (but not higher since the ceiling is so high). Halfway up, there will be another row of the small tiles from the backsplash.
  • Grout: We haven't thought much about this yet. I only recently found out that grout comes in different colours.
  • Walls: We haven't chosen an exact paint colour, but perhaps something like this:


Planning with the plumber and contractor

The plumber came to visit to see the room and possibility to get water up and waste down the house. He established that following the existing furnace chimney would be possible and gave some ideas for the bathroom itself, but deferred to a contractor friend of his for the more construction-intensive framing and carpentry.
I later got a quote from the plumber that was quite close to what I had expected. One of the other nice things about this was that he is focussed on selling his skills and service and not marking up fixtures, so he just passes on his discount at Keller to me.

I contacted the contractor that he suggested and he came out for a visit too. He pointed out that due to the extra weight of a large tub full of water (as opposed to a shower which may not have needed this) he would need to upgrade the floor to avoid stressing the dining room downstairs as well as upgrade the ceiling in the basement since some of the weight of the bathroom is in the middle of a rafter as opposed to the foundation itself. We also discussed numerous details such as making room for a door and also some recessed cabinetry in the corridor. I had not expected some of these, since I had been so focussed on how to get the plumbing but I'd rather feel secure that the dining room ceiling isn't going to develop sags or cracks.

Over the months, we have worked extensively with the plumber and contractor and have come to finalised decisions about exactly how things are going to be laid out and constructed. The culmination of this has been to sign contracts with both of them. There has been a lot of back and forth on this and multiple visits by both of them.

Along the way there have been a few price shocks:

  • The way the contractor works is to add a markup on top of all labour and materials of 17.5% before the tax is added subsequently. That can add up to a lot. One of the ways that I avoided this was to charge all the fixtures and plumbing work directly through the plumber and manage him myself. The downside of this has been coordinating independently with the plumber to make sure everything lines up (which has been non-trivial but quite manageable) but I still think the savings is worth it.
  • The window expansion we planned has been far more costly than expected. In the contract, the contractor included a number of 'allowances' which are estimates of material cost. The window allowance was far less than what it turned out to cost. Ultimately, we chose a mid-range window (vinyl double casement) because the next level up was aluminium double casement and cost twice as much, just to get a slightly smaller sash and jamb. I just couldn't justify it.
  • We didn't end up having an allowance at all for the granite tub deck and vanity countertop and that has turned out to be far more expensive than I expected. However, we've chosen one that is still really nice looking and on the lower end of the price range.
  • We still need to select a glass shower door. The bathtub will be right in front of the window so we want to be able to see through it and not obscure it with a shower curtain. I worry some that this will be expensive though the allowance for it is quite high already.
There are a few things that we are not choosing at all. The contractor is selecting these completely based on our general preference. That is to say, there is not much in the way of meaningful choice here. The door to the bathroom will be replaced with a bigger one since the current one is really very short and narrow. The skylight is also a fixed item per our sizing request. We chose floor heating both because it's an efficient and space-saving way to heat the room and because it's nice :) There is a thermostat that controls this on a timer. I was hoping to put a Nest in there but it turns out that the floor heating isn't something that can use arbitrary thermostats for some reason.

One of the things we struggled with when planning was bathroom usage. The workers are here for two months and there will be between one and five people in the house while we're not at home. Initially we didn't even think about this but then the contractor pointed out that there would be increased usage of the bathroom and that the workers are not clean while working. We went back and forth on whether to get a porta potty in the driveway or not. Ultimately we decided not to, to save some money as well as not subject them to the cold and indignity when there is a perfectly functional bathroom. We'll have to clean it far more frequently probably, but we'll see how this goes. We can always add it later, or just for the times when there are going to be a lot of people working in the house.

Monday, January 6, 2014

Shopping for fixtures

Having scheduled a visit to Keller, we went for our appointment. I don't know about other bathroom shops, but the way this one works is that you schedule an appointment with someone who spends some time with you to pick out fixtures for the bathroom. They're open during normal business hours but if you don't have an appointment I don't know how much help you'll get. Another time, we went on a Saturday (when they don't do appointments) and happened to find someone to help us, but it may have been just by chance.
I wasn't quite sure what to expect. I was hoping that they'd help with some of the fundamentals or layout and so on, but it was much more focussed on the fixtures themselves. That in itself turned out to be a fairly deep task as well. We covered different types of fixtures as well as different brands and costs. Based on our three visits to Keller over the planning phase, here are some considerations for different kinds of fixtures:
  • Tub
    • Types include free-standing (stands completely on its own); drop in (the lip of the tub is over the edge of the tub deck surface); undermount (the top of the tub is underneath the tub deck surface); alcove (fits in an existing nook)
      Here's a page that shows all the examples: http://www.us.kohler.com/us/Baths/content/CNT2400361.htm
    • Feature-wise, there are a variety of things you can add beyond the basic container of water: whirlpool (jets of water), bubble (jets of air), heated water (the water stays warm while taking a bath), heated surface (so you don't have to heat the tub back with your own back), music and lights. We were really focussed on a fairly simple tub with an option of a whirlpool. Ultimately we decided against a whirlpool because it was more than 2x the cost of a normal tub and because it requires more cleaning. It was also questionable how often we'd really end up using it.
    • You can get normal size tubs and long ones. This was really something attractive because I've always had to bend my knees to fit into a tub if I'm sitting in it. You can also get taller and shorter sides.
  • Shower system
    • This can get quite complex depending on how many places water can come out from. For the tub itself, there is a tub filler spout. Then there is the shower itself. This can be a fixed showerhead or a handheld one, or both. Then, you can add even more outputs like water coming out of the wall on the side, etc. The shower heads themselves also come in a variety of designs with massage jets and all that. In the shower, you also need to decide whether you want to control the temperature independently of the volume (like on a sink; this is a T/P valve) or whether a fixed volume is fine (this is a P valve). Then there is the issues of sending water around to the various outputs - this is accomplished by diverters or transfers.
      Much more on this here: http://www.us.kohler.com/us/How-to-Shop-for-Shower-Valves-and-Controls/content/CNT800387.htm
  • Sink
    • Again, drop-in and undermount and also those that sit like a bowl on a vanity.
    • Other than that, it's design choices on shape and size/depth.
  • Sink faucet
    • All of these control volume of water and temperature but can come as a single unit including the faucet and temperature and volume, or separate controls for these. Having everything in one was definitely nice because it takes up less space on the counter and requires fewer holes made in the countertop.
  • Toilet
    • We started by limiting ourselves to a wall mounted toilet. This allows for the tank to be in the dead space behind the wall that is to be created and also to facilitate cleaning by not having it be on the floor and by not having any nooks and crannies in the toilet itself.
  • Vanity
    • We looked at these at Keller as well but ultimately decided to build it out of Ikea kitchen cabinets. More on this later.
Another general consideration is the finish of the metallic parts. Chrome tends to be the cheapest, followed by brushed chrome or nickel. The advantage of the brushed materials is that they don't show water stains. However, in my opinion I prefer the shininess of chrome and the brushed materials look weathered to me, perhaps because I am accustomed to chrome.

Costs of all these are driven by features (anything beyond the basics adds up quickly), the finish (chrome/nickel), how much material there is (for tubs, freestanding ones are expensive because they have four sides, those with an apron are somewhat more expensive), and design/brand (a ceiling mounted tub filler is easily twice a regular one and an egg-shaped tub is probably more than a simple rectangle). Another thing to consider is that trim made of plastic is cheaper than metal trim. It's easy to have chrome coloured plastic so that is a good place to save.

Once I received a quote from Keller for the fixtures, I compared every single item to what you could buy online, like Home Depot, etc. Surprisingly, you can even buy bathtubs on Amazon though it won't be a 2-day delivery :)
Although I was getting a discount by going through the plumber for purchasing the pieces, I was a bit suspicious that they would be able to have better pricing than a low-cost online operation. As it turned out, every item is cheaper bought through Keller than elsewhere. Things that were not cheaper were those that are easy to find anywhere and don't have great variation in quality. These are mostly trim pieces and non-plumbing items, like towel hooks, mirrors, toilet paper holders, etc. You can find these at a quarter of the price at Ikea for example, or Lowe's, Bed Bath and Beyond, etc.

Ultimately we decided on the following and ordered it with a deposit of half the cost:
Note that some of these items may not be in stock, so make sure to order them in good time as there can be a lead time of several weeks (the longest for me is 4 weeks, but depending on where it is coming from it could be longer).

Saturday, January 4, 2014

Finding people and places

This summer I changed jobs and made sure to have some time off. I took six weeks off between jobs. In retrospect, I wish I had taken 12 weeks or 6 months off. I could have definitely used the time and not gotten bored!

During that time, amongst other things, I started the process of finding someone or somewhere to help with this project. I didn't even know what kind of people I needed or where to start.
I did some searching on the web and found a shop here in Seattle that sells bathroom fixtures (Keller), thinking that would be a good place to start. I found a few other places too but Keller seemed to have the biggest selection in brands.
http://www.kellersupply.com/branches/wa-keller-supply-kitchen-bath-showcase-20
I gave them a call to ask them for some advice and spoke to a lady there. One of her first questions was if I was already working with a plumber. I said no, and she recommended one. So that seemed like a good start. I also arranged an appointment at Keller to go over the project.
The reason that I didn't start at a hardware store like Lowe's or Home Depot was because I had far too many questions to get answered about the project in general, as opposed to looking for a particular item.

I gave the plumber a call and he agreed to come by to take a look a few days later.

I knew that I needed a plumber but had no idea how to find one, so the fact that he came recommended was important to me. Otherwise, I might as well have opened the phone book and pointed at a random one. I'm not a believer in Angie's List at all. I find it insulting that you have to pay to access content that's not even written by the company. Yelp has a much better model of collecting and presenting user content.

Friday, January 3, 2014

Some initial ideas

Over the years, I came up with and collected a number of ideas of how this bathroom should look and be laid out. I've never had a great deal of major renovation or construction experience, let alone building a whole room. Everything I'd done before was small DIY stuff, so I had no experience hiring other people to do work.

Evidently, the shape of the room is quite unique, so it requires a unique layout. How to take advantage of all the vertical space and not waste any space? I'm very much against dead space and like to find creative and smart ways to make use of it. That meant using the spaces that are currently accessible but would become blocked off by a traditional box room construction. Here are some ideas over time:

  • Ensuring that the storage spaces remain accessible somehow
  • Tucking the toilet tank into the wall -- this is an idea my uncle who is an architect gave to me
  • Creating an access door from another room to space that can only really be used for storage (you can't stand up in it)
  • Ensuring that the window is visible and the view can be enjoyed. I also wanted to grow the window because I love looking outside and having natural light. When I'm indoors, if I'm near a window, I feel much more energised.
  • I've always liked baths so a bath tub is a must, as opposed to a shower stall. But I usually take showers and have almost always had shower/tub combinations so that was not negotiable. I've seen setups where there is a tub separated from a shower, but I just can't understand how you get from the tub to the shower without dripping soapy or dirty water all over the floor. Recently, I saw a layout where the tub is "inside" the shower area so you can remain in the "wet" area when you move, but that requires a rather large space.
  • Using the diagonal interior roof in a good way. One side would likely have to be blocked with a vertical wall, but the other can be used potentially to build a "staircase" of shelves.
I decided to get rid of the loft to open up the ceiling and was left with two basic layouts:
1. Put the tub by the window so you can enjoy the view from the tub.
2. Put the sink(s) by the window so you can enjoy it while you wash your hands.

This brought up the question of a single or double sink. Honestly, I've never understood the purpose of a double sink. For me, the bathroom is a sanctuary. It is somewhere that you can be alone and shut the door if you want. Being on the toilet with someone else in the bathroom disgusts me. Fortunately, +Liana feels the same way so there was no discussion of a double sink. I thought briefly about resale value but then decided that our own pleasure trumped resale value as I'm not doing this construction to flip the house. If someone in the future wants a double sink then they can install the kind that they like and not the one we chose for them. Also, it's cheaper to buy one sink than two.

All of these come with their own challenges. How to maintain privacy if you have a window facing the street? I've never been one to feel too shy about being seen through windows. So I decided the view and the light is the most important. We might put some kind of blind on the window though, depending on how the window ends up looking.

What about the roof? It's tall and it looks cool, but it also means a great distance to get to whatever lighting fixture we hang there (will we need a ladder to change the light bulb?). But that means the weird loft has to go. The weird loft had to go anyway. It's barely tall enough to let a person underneath it. Also, the bathroom won't be a typical box room with a flat ceiling. We'll see how that works out.

More practically, the room has nothing but a number of electrical outlets and a floor and some patchy drywall. No sewage or plumbing. Over time, I found that either the sewer line (really the main difficulty since it has to flow with gravity as opposed to pressure, like a water line) can go next to the furnace chimney stack or out of the exterior wall and down the side of the house. The chimney stack is the way to go. It happens to run next to a wardrobe downstairs so we'll lose a little space in the wardrobe but that's a better solution than having something on the exterior of the house.

One final thing, how to get to that storage space to the right when you look at the door from inside the bathroom?

Once the wall is constructed, there's no access. One of the walls is adjacent to the wardrobe in the master bathroom. That's the wall where I decided to install a small door to be able to store rarely needed things, like moving boxes.
You can also see the chimney from the furnace next to which the sewer line can go.

Over the years, I had a decent high-level plan, but never gave myself the time to refine the plan or execute it. NB: there's no such thing as "I don't have time" -- it's all a matter of what you choose to spend your time on.
Also, for me, starting big things, like big projects or thick books is daunting, so this was always on the procrastination list.
Then, finally this summer, I made the time and got going...

Thursday, January 2, 2014

The beginning

I live in Capitol Hill in Seattle in a house on a busy street. It has 3 bedrooms and a bathroom, along with an empty unfinished room upstairs. I moved there in 2007, just over 6 years ago, and at the time, someone suggested turning that empty room into a bathroom so that it could be near the master bedroom upstairs which is the only other room on that floor.
I immediately got to work on that plan and six years later, not much had happened. At one point, I had a couple of design & build firms look at it and they came back with outrageously high bids replete with architect fees and so on. It became apparent to me that an architect is unnecessary for such a small project. Personally, I'd only hire an architect if I was at least doing a multi-room remodel with structural changes.
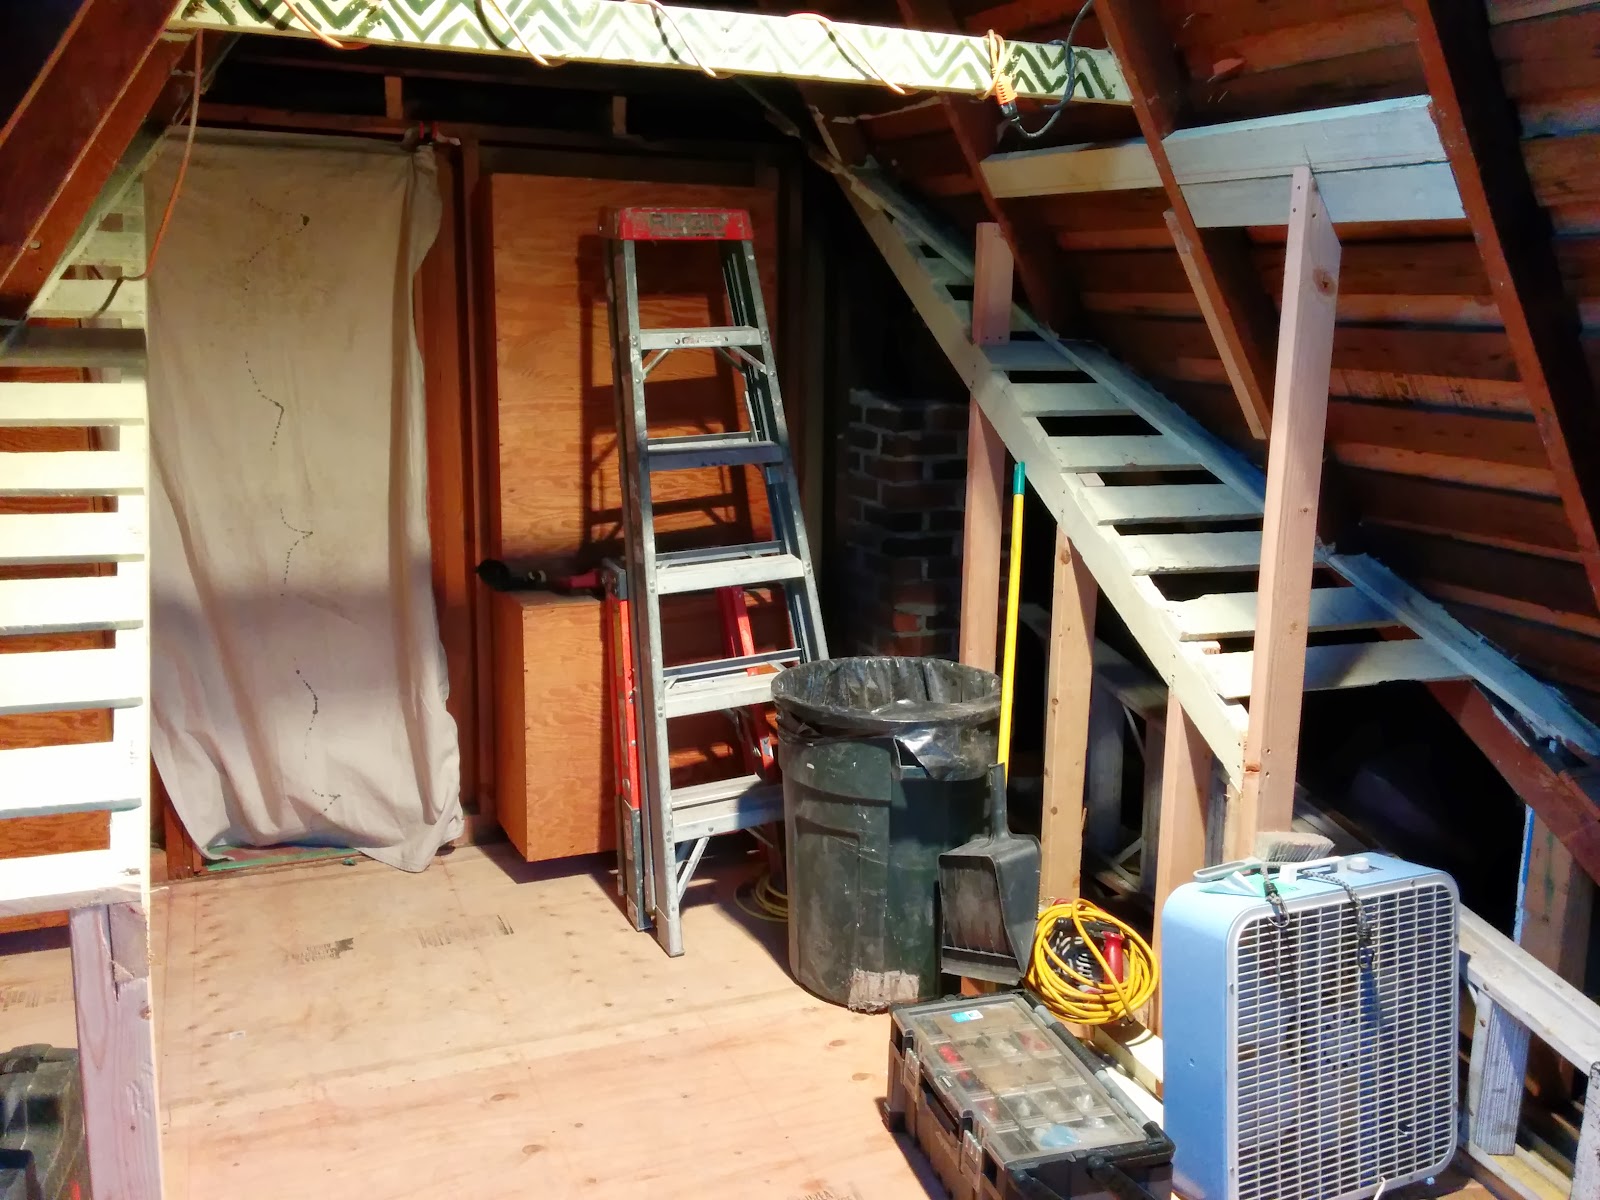
So here's how the room looked 6 years after I bought the house (and still does at the moment, complete with ironing board and random junk):
And here's a photo looking the other way. That window is the only one in the house with a view of any kind. It looks eastwards over the street but it also looks over the houses across the street and has a partial view of the lake and the Cascades.
It's an interesting room as it is under the gable of the roof and is crossed by the roof going in the other direction. As a result, it has a very high peaked ceiling.
There's no heat in this room (the rest of the house is forced air and it's at about maximum capacity for the registers that exist), there's no lighting nor plumbing. There are a number of electrical outlets but that's it. The floor is made of a variety of wood pieces including a table leaf. There's a loft with an interesting design painted on it and the stack from the furnace in the basement runs through the room too.

The procrastination got so bad that my friends made a verb, "to upstairs bathroom" something, which means to indefinitely postpone something. Then, this summer, my girlfriend moved in and the challenge of having four people in one bathroom loomed, as my parents visit every winter from Denmark. I also took some time off between jobs and had some time to think more seriously about this and find someone to do the work.


Here are some sketches of the room that I made with Sketchup which has proved invaluable in many projects:

The upstairs bathroom

This is the beginning of a blog documenting my experience installing a bathroom from scratch upstairs in my house.
I'll include what I learned along the way, pictures of the project and how we did things.